
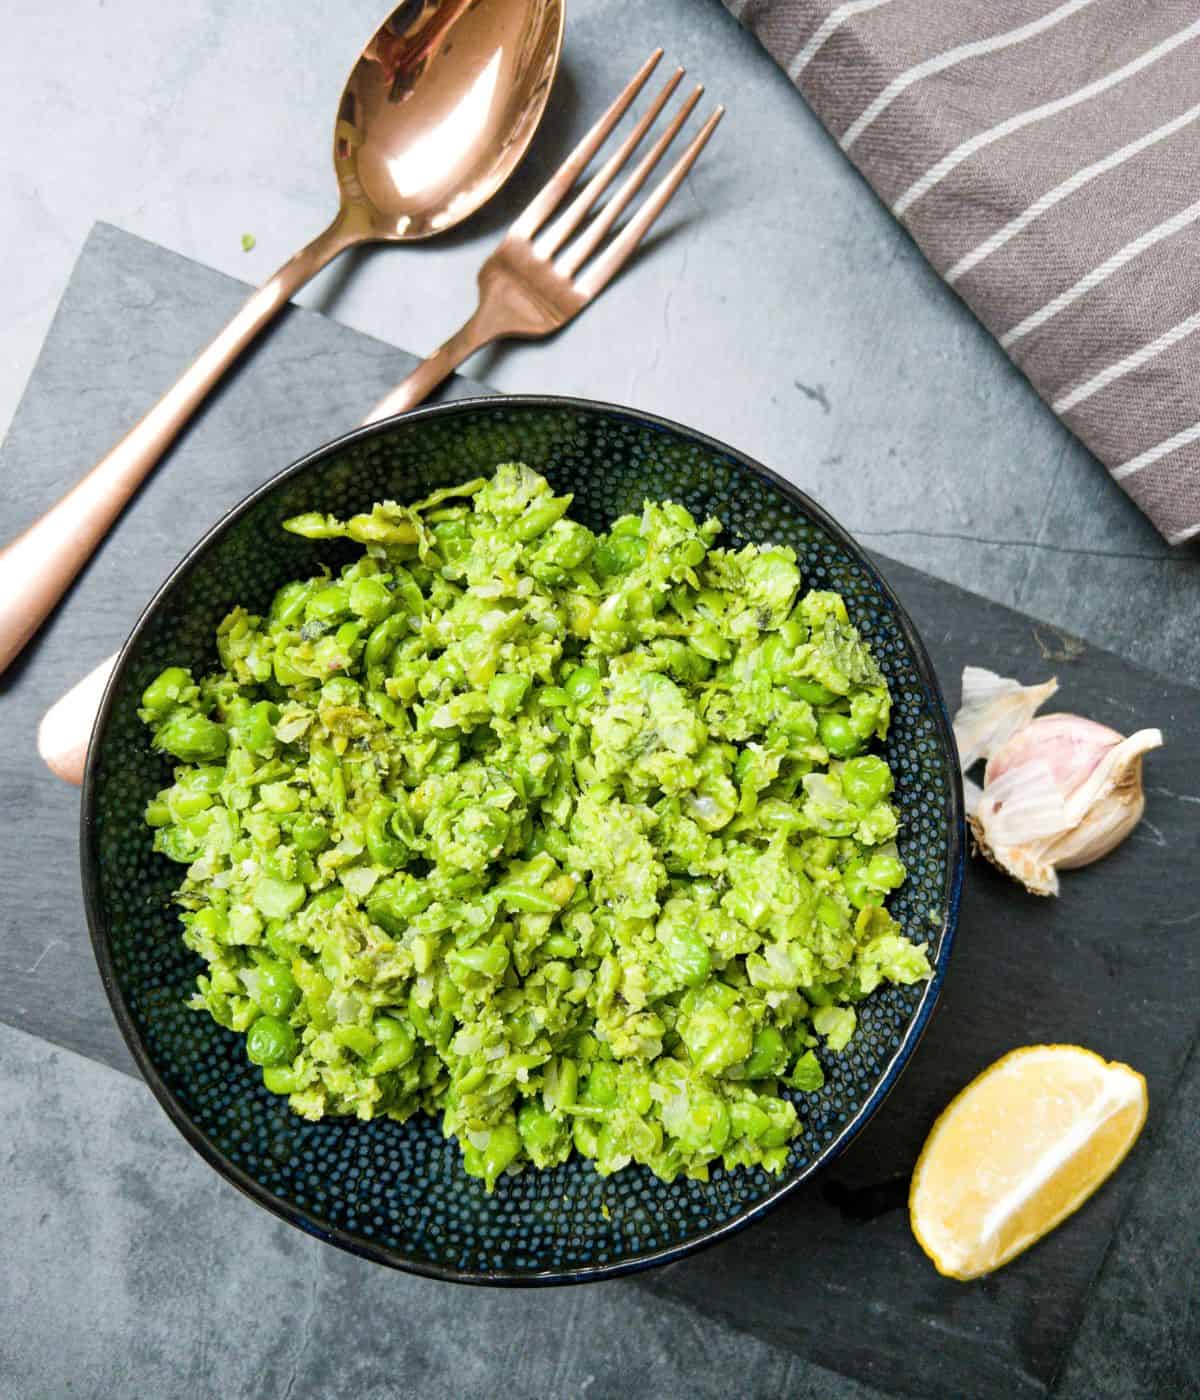
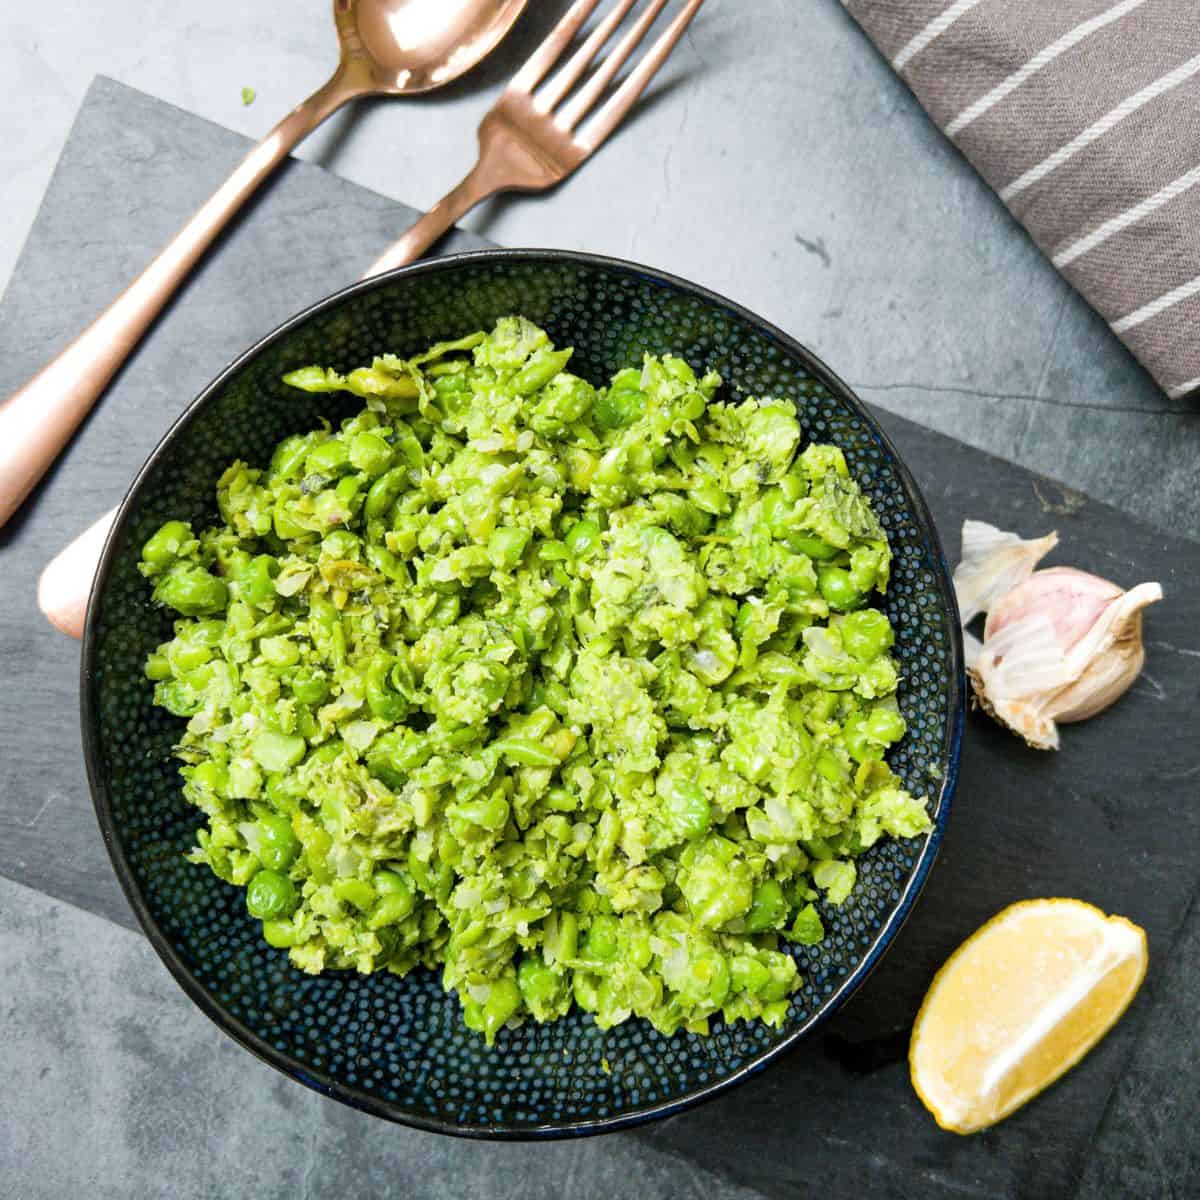
Indulge in the classic British side dish for fish & chips, that's as simple to make as it is delicious. This Minted Mushy Peas recipe will surely become a staple in your kitchen. They also make the perfect accompaniment to any fish or meat dish and are free from the top 14 allergens!
Want to Save This Recipe?
Enter your email & I'll send it to your inbox. Plus, get great new recipes from me every week!
By submitting this form, you consent to receive emails from The Scatty Mum.
Mushy peas are something of a British institution. Throughout the country, especially in northern parts, no fish and chip supper would be complete without a tub of this warm, soft delight. Normally they are not minted in flavour but I have put a little spin on them to make these minted mushy peas which I hope you will find delicious!
Now, traditionally mushy peas are made with marrowfat peas, which are then soaked overnight in water with some baking soda (AKA bicarbonate of soda), then thoroughly rinsed and boiled for around 30 minutes until soft.
This sounded like a lot of work to me!
So I swapped the marrowfat peas for frozen garden peas and the result was so flavoursome and so quick & easy that I think any traditionalists may forgive me!
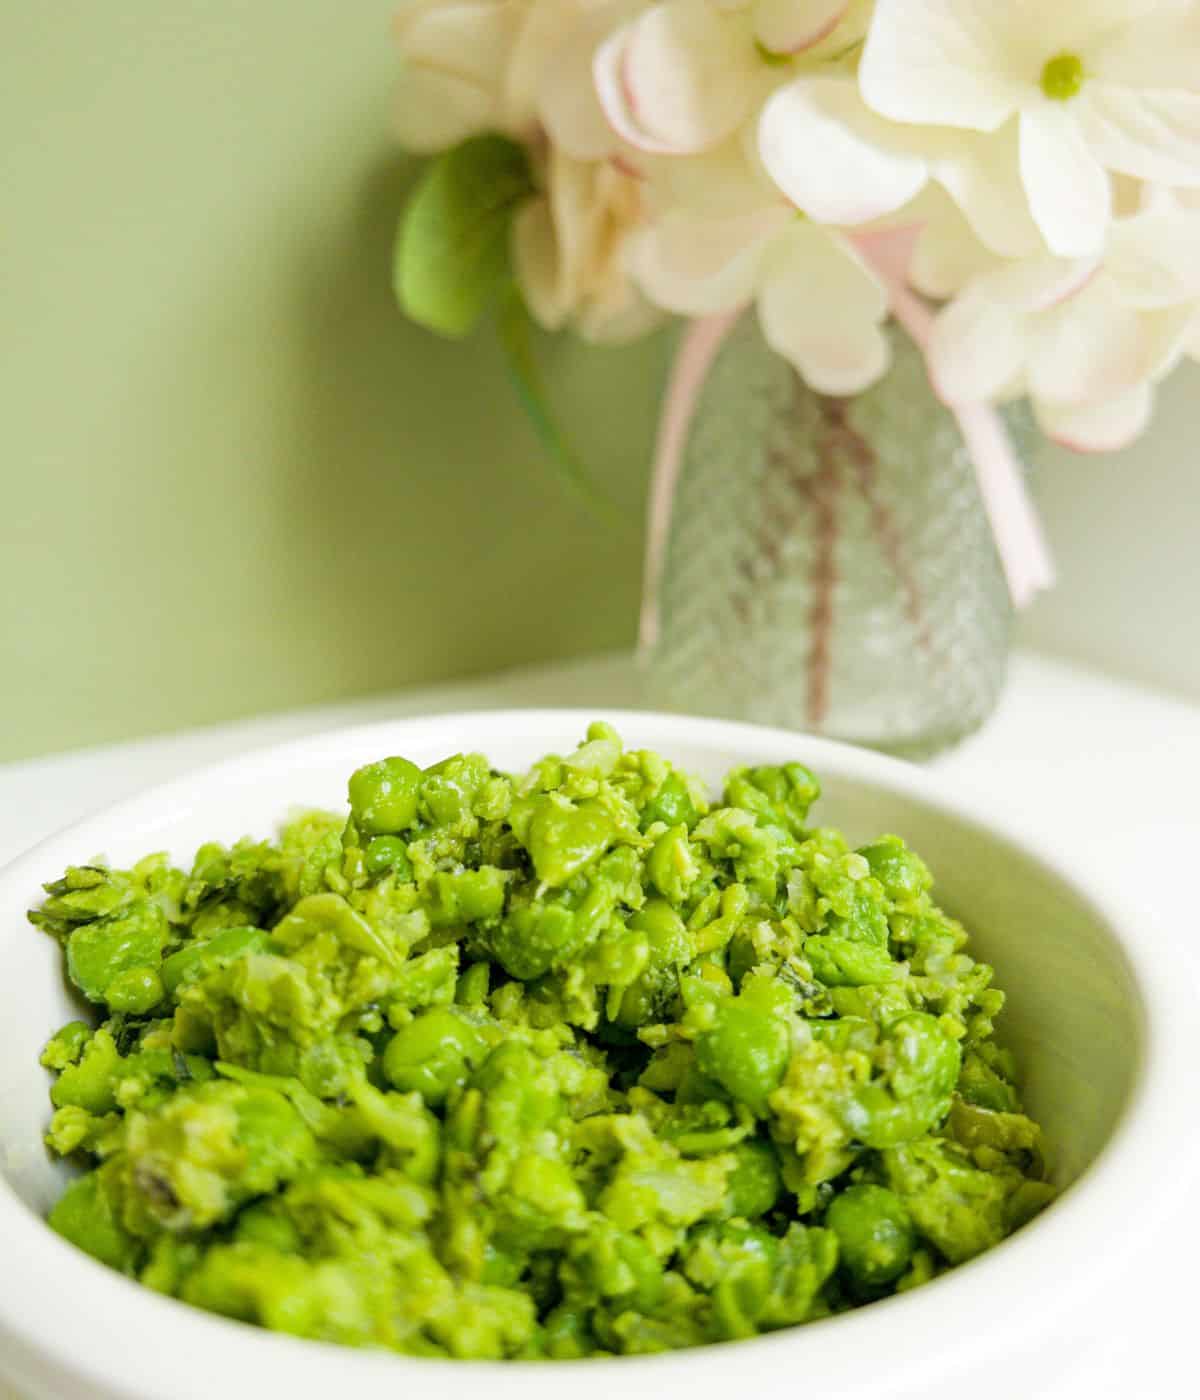
The peas are mixed with softened onion and garlic, some freshly chopped mint leaves, then crushed with a potato masher and finished off with a squeeze of fresh lemon juice to really bring out that minty flavour.
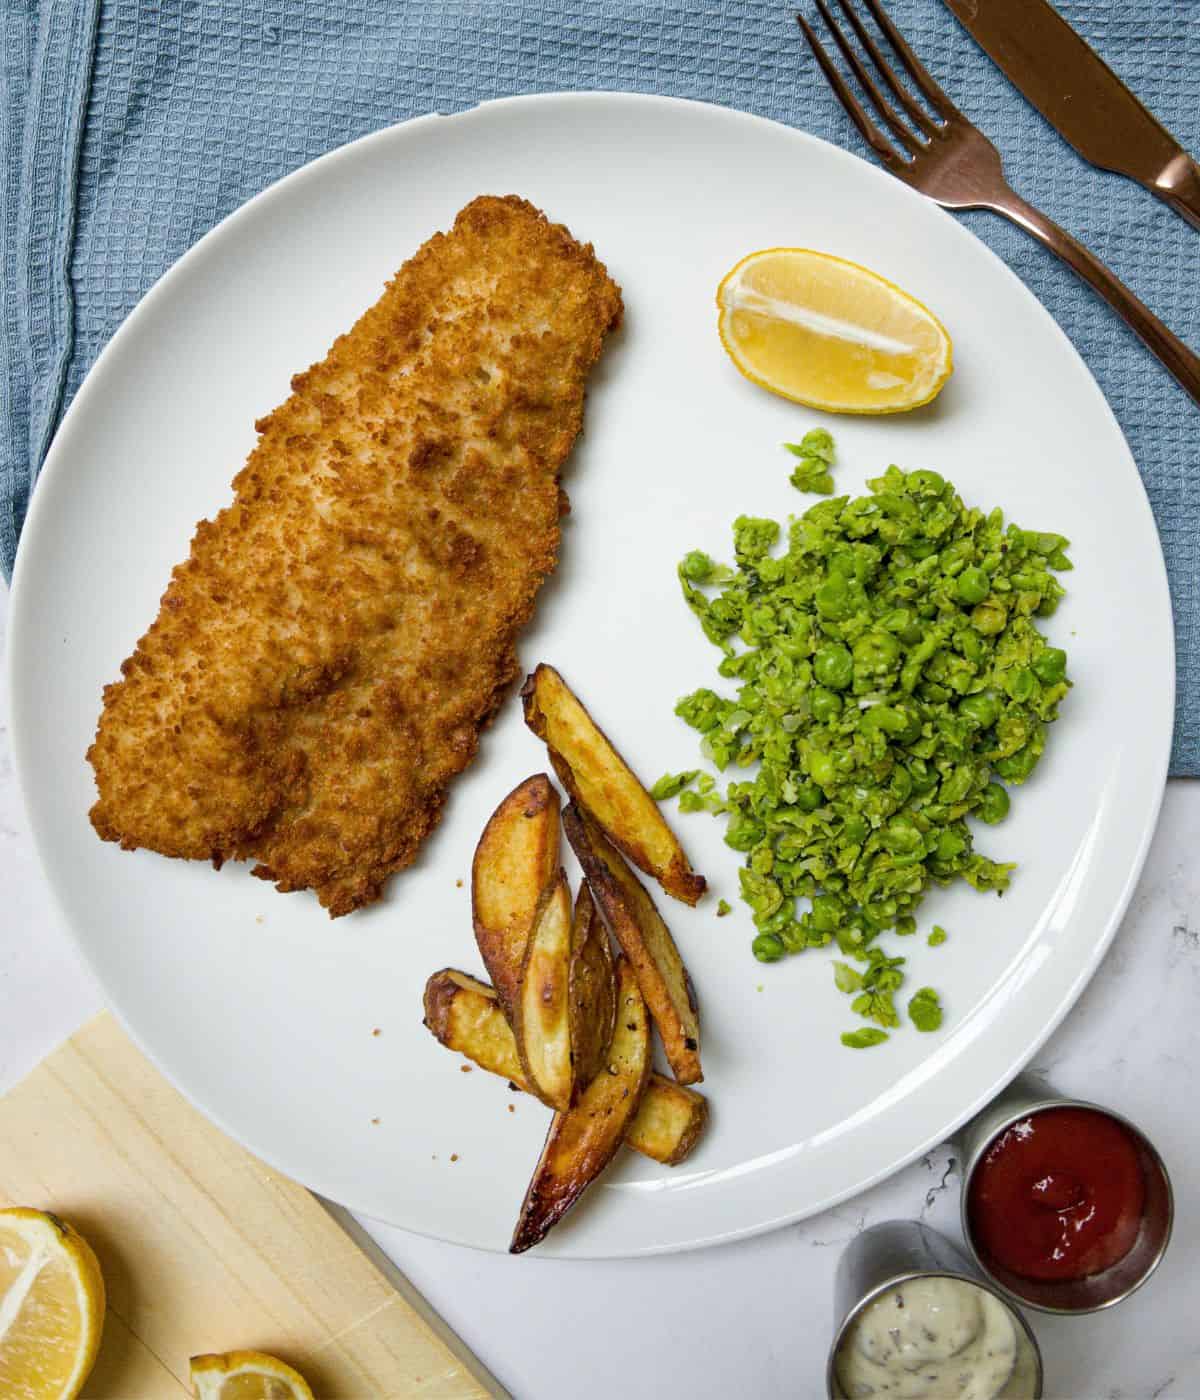
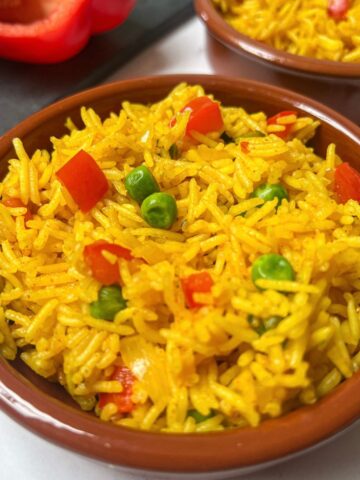
For a healthier take on classic fish and chips, pair these smashed peas with air-fried sea bass and homemade Cajun fries. They are also delicious served instead of traditional peas with this leftover lamb shepherd's pie or these salmon & sweet potato fishcakes.
If British classics are a bit of you, take a look at this Sausage Plait & Minced Lamb Hotpot!
Jump to:
🥘 Ingredients You Will Need
✋ Double check all packaging for allergens ✋

- Peas - Marrowfat peas are traditionally used but I have used frozen garden peas as they are really good value and most people always have a bag lurking in the freezer. You can also use frozen petit pois. Frozen peas also taste great in this dairy-free fish pie.
- Garlic & Onion-These act as a flavour enhancer to the peas.
- Lemon Juice - Try and use fresh lemon juice if you can & not the stuff in a jar as the taste is totally different. Use any leftover lemon juice to make this lemon & garlic chicken traybake.
- Mint - Again, fresh is best! You will not achieve the same flavour with dried mint, but if it is all you have you can use this instead, just don't use as much, as dried herbs have a stronger flavour. A general rule of thumb is to use one-third the amount of dried herb for fresh herb.
- Olive Oil - This is used to fry the onion and garlic. Any neutral tasting oil can also be used. If you don't need the recipe to be dairy free a large knob of butter can be used instead.
Scroll to the recipe card at the bottom of the page for quantities.
✏️ How To Make - Step-By-Step Instructions
⬇️ Here you will find an overview of how to make the recipe. For full information on ingredients and quantities please see the recipe card at the bottom of the page ⬇️
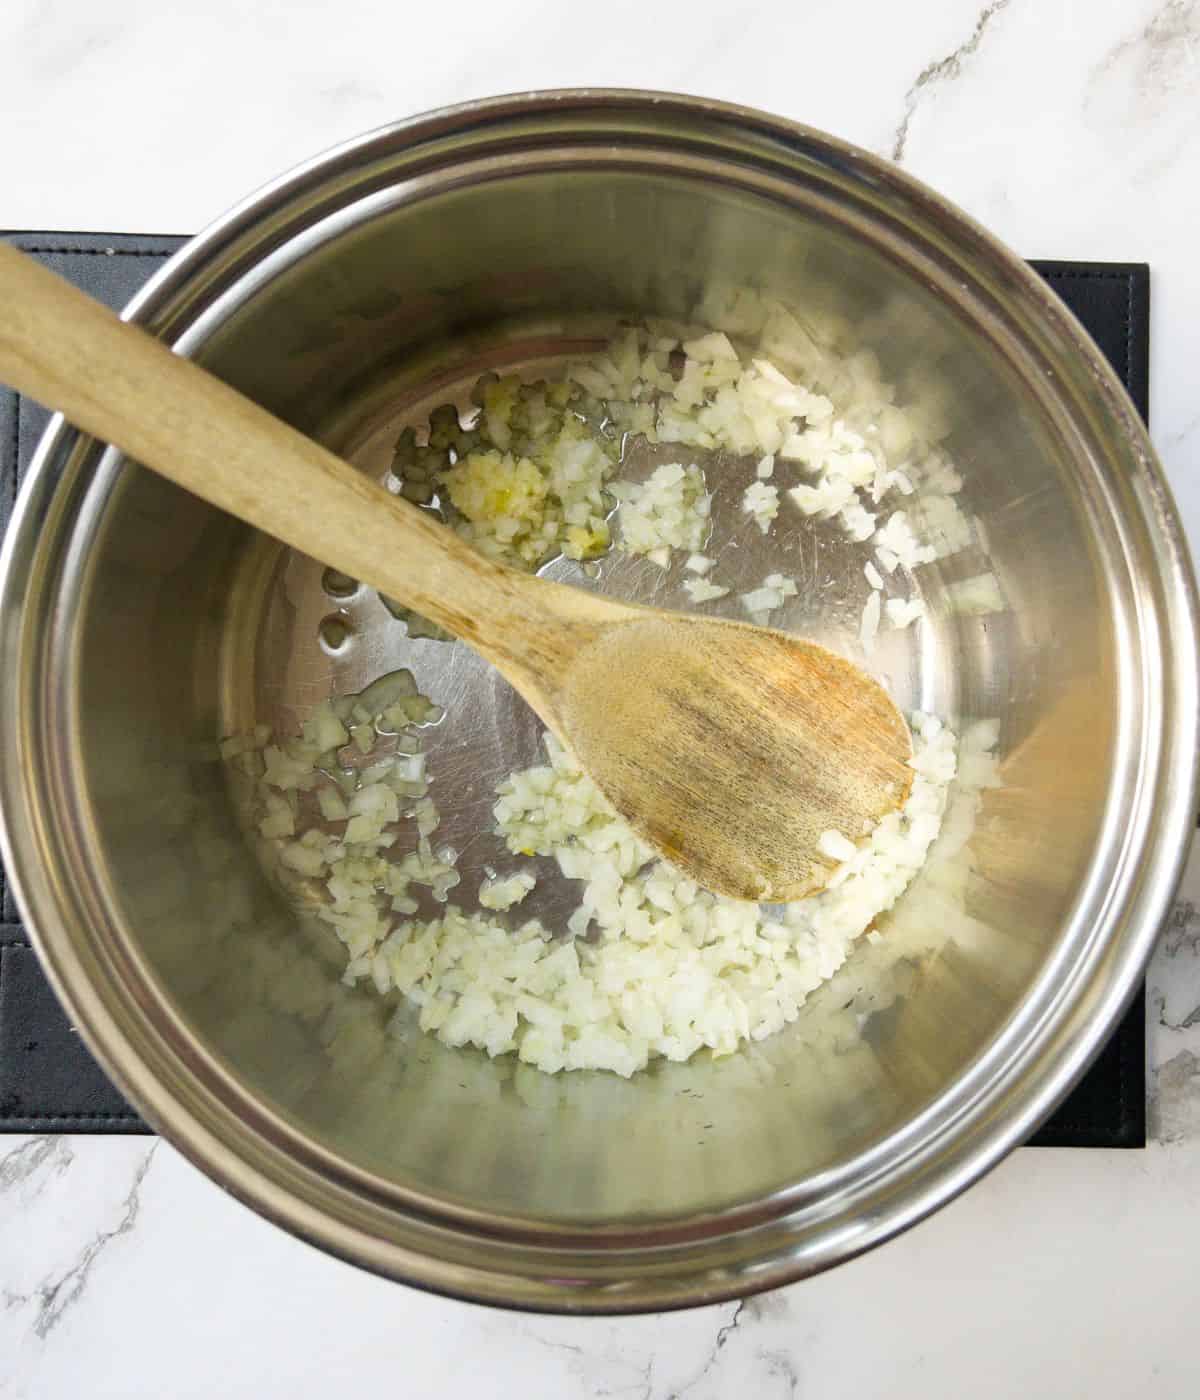
Step 1: Start by chopping the onion finely and crushing the garlic with a garlic press. (See tips and tricks below) then fry them gently in a saucepan on a low heat with some olive oil until they start to soften.
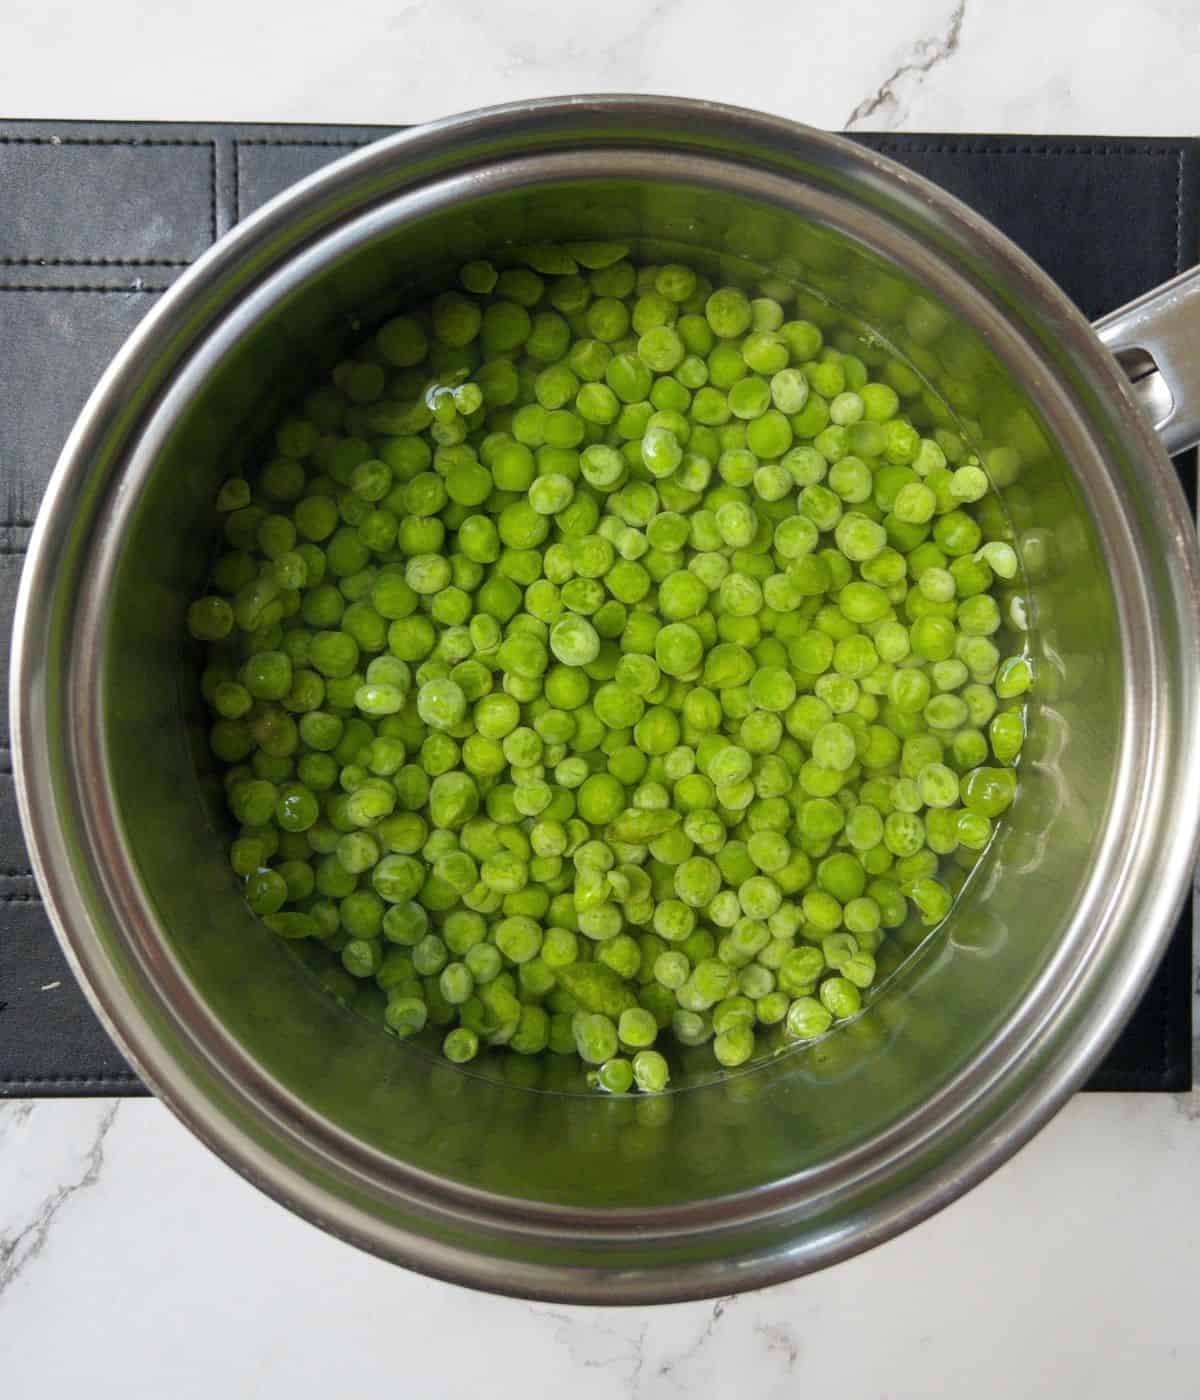
Step 2: While the onion and garlic are cooking, boil the peas in a separate saucepan in some water for 3 minutes then drain them into a sieve or colander.
Step 3: Finely chop the mint and slice the lemon in half.
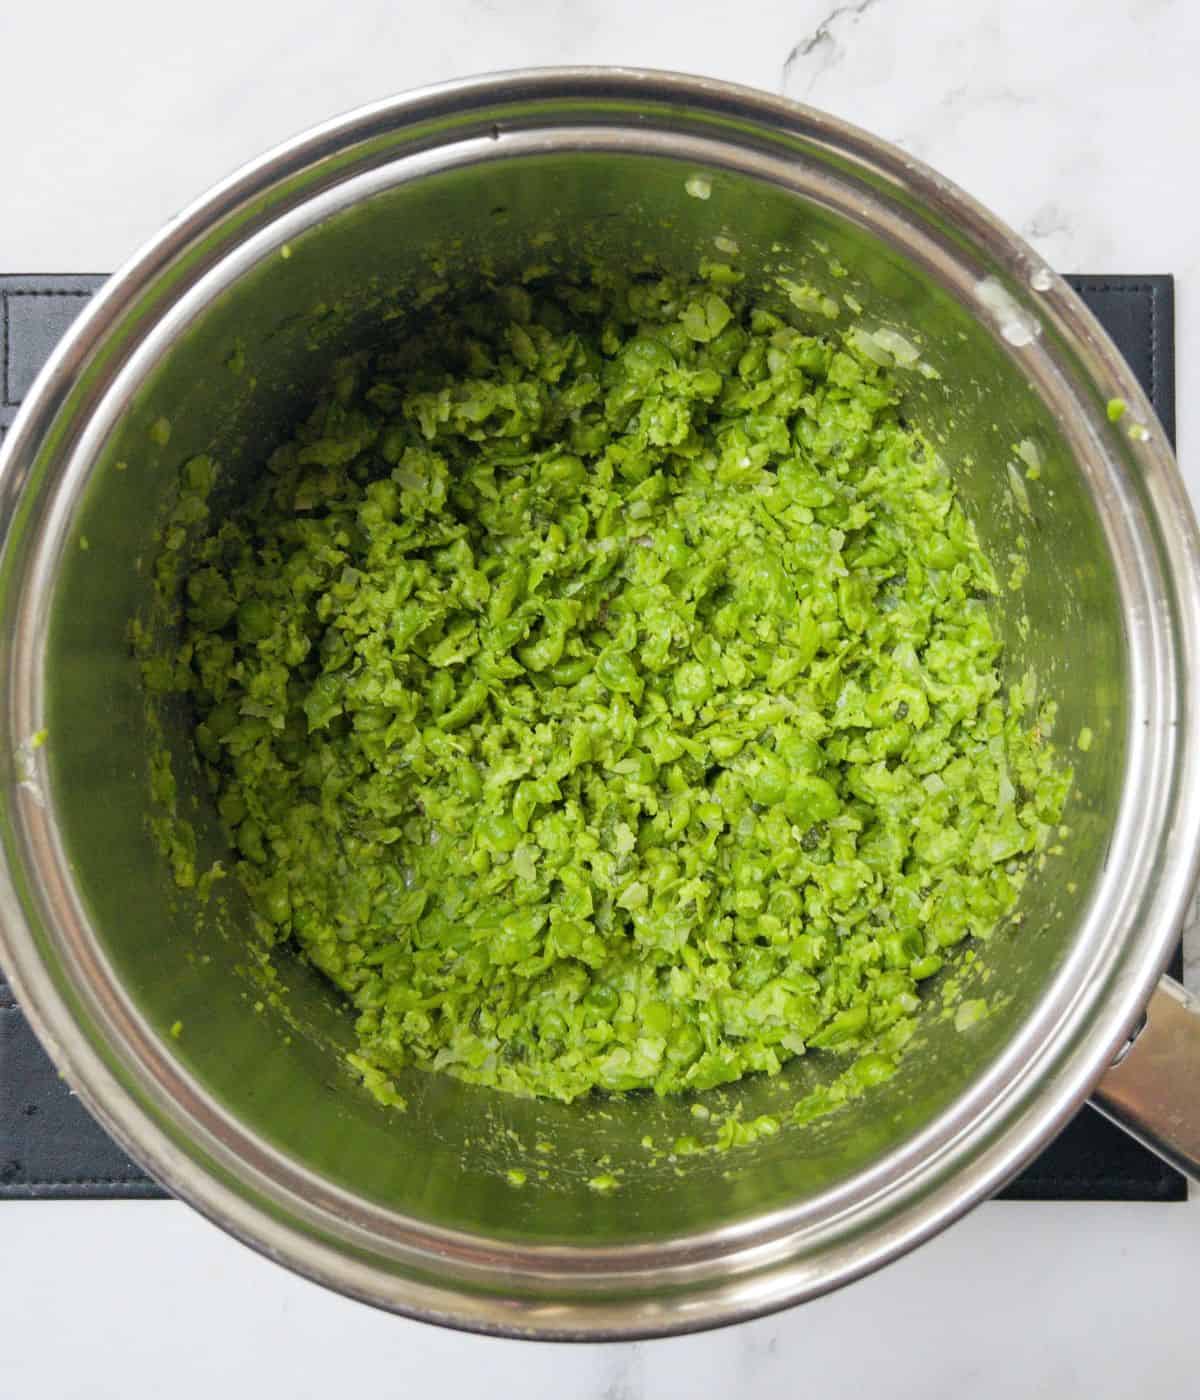
Step 4: Add the cooked peas to the saucepan with the onion and garlic, then sprinkle in the chopped mint.
Step 5: Mash the pea mixture with a potato masher until most of the peas are crushed. If you like a bit of texture, leave some whole ones.
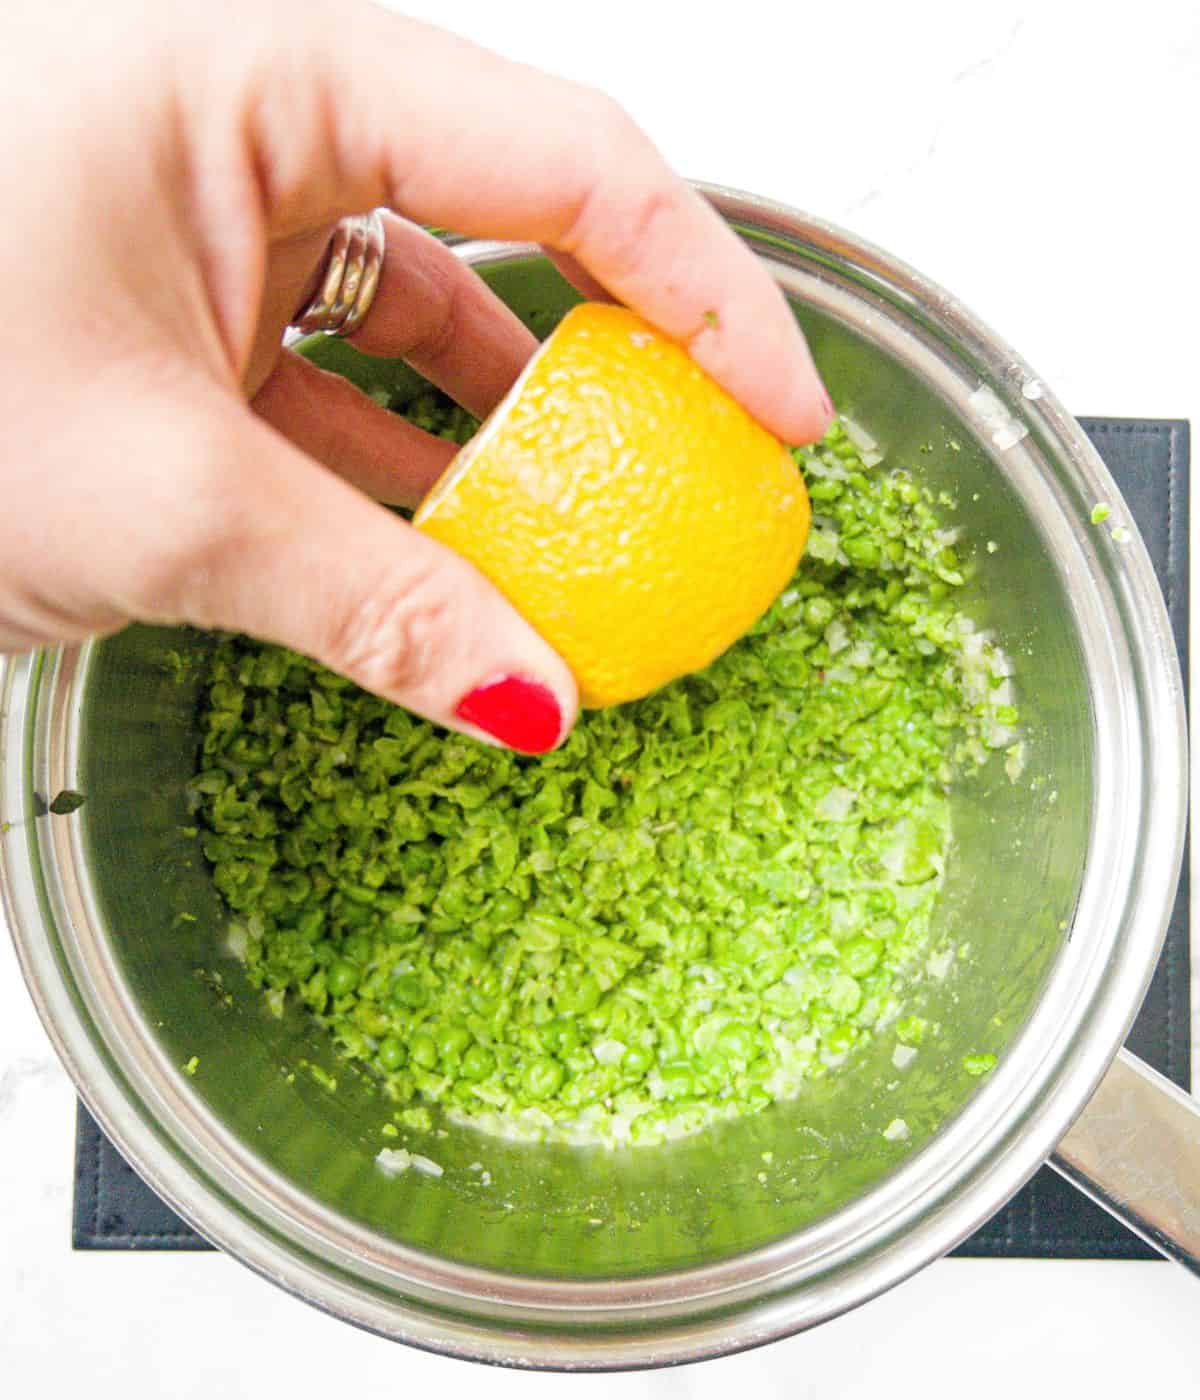
Step 6: Add a squeeze of lemon, then season with salt and freshly ground black pepper before serving.
(If you are cooking for small children you may wish to leave out the seasoning)
💡 Tips & Tricks
- ✔️ Chop the onion really finely and use a garlic press to mince the garlic. As you won't be blending the peas and just using a potato masher, this will mean you won't get huge chunks of garlic or onion in your mushy peas. Unless you love big chunks, then in which case, cut them larger!
- ✔️ If you prefer a smoother texture, use a stick blender to blend the peas, until they resemble the texture of a thick puree. The peas are delicious served with scallops like this!
- ✔️Add the mint slowly & taste as you go, adjusting the amount of mint used to tailor it to your taste preference.
- ✔️ Balance the Sweetness. Adding a pinch of sugar to the cooked peas can help balance any natural sweetness lost during freezing and cooking.
- ✔️ Add a touch of creaminess. For a richer and more decadent flavour, stir in a splash of heavy cream or crème fraîche. ( Dairy-free if needed)
⚡ Variations
- Spice it up! - Add a teaspoon of chilli flakes or half of a chopped red chilli through the mash mixture and stir in to give your mushy peas some heat!
- Puree - If you want to make this into a puree to serve alongside some scallops or even for a baby puree, add a tablespoon or two of the cooking water from the peas and add to the saucepan before blending with a stick blender until you have reached a smooth consistency, adding more water if needed.
- Fritters - Make them into pea fritters, swapping the sweetcorn in this egg free fritter recipe for the same amount in weight of the mushy pea mixture.
- Make Them Macho - By leaving the peas whole and not mashing them and adding in a sprinkle of chilli flakes, these minty peas taste just like the famous Nando's macho peas. Serve them alongside this peri-peri- butterfly chicken and homemade spicy rice.
🥡 Storage, Reheating & Freezing
Leftovers can be cooled and kept in the fridge in an airtight container for up to 3 days.
To re-heat, pop in the microwave for a couple of minutes, until piping hot, stirring halfway.
You can also freeze the mushy peas in a suitable container for up to 3 months.
When ready to serve, defrost in the fridge overnight and reheat as above.
💬 Recipe FAQs
Marrowfat peas are green mature peas that are left to dry out in the field instead of being harvested when they are young. They are larger than the garden pea and not as green.
This recipe consists of garden peas, which are a great source of vitamin C, E & zinc and other anti-oxidants that strengthen your immune system. Also, the fresh mint is brilliant for digestion so these minted mushy peas are a healthy side dish.
Can I use fresh peas instead of frozen for this recipe?
Absolutely! While frozen peas are convenient, you can certainly use fresh peas. Simply adjust the cooking time to around 1 minute. Once the peas all rise to the top they are done.
Can I use minted mushy peas as a filling for other dishes?
Absolutely! Get creative and use minted mushy peas as a filling for wraps, and sandwiches, or even as a topping for baked potatoes.
📘 More Pea-sing Recipes!
Peas are such a versatile vegetable and can be added to many different dishes.. check out these other delicious ideas!


If you loved this recipe, please leave me a 5🌟 rating or comment below. I really do appreciate it. 😊
📖 Recipe
Minted Mushy Peas
Equipment
- Stick Blender optional
Ingredients
- 400 g (2.5 cups) garden peas frozen
- 1 clove garlic crushed
- ½ small onion finely chopped
- 5 g (2-3 sprigs) fresh mint
- 1 tablespoon olive oil
- 1 squeeze fresh lemon juice
- salt & pepper to taste
Instructions
- Chop the onion really finely and crush the garlic with a garlic press. (See tips and tricks below) then fry them gently in a saucepan with some olive oil on a low to medium heat for 4-5 minutes until soft.
- While the onion and garlic are cooking, boil the peas in a separate saucepan in some water for 3 minutes, then drain into a sieve or colander.
- Finely chop the mint and slice the lemon in half.
- Add the cooked peas to the saucepan with the onion and garlic and add the fresh mint.
- Mash with a potato masher until most of the peas are crushed. You want to leave some whole ones for texture.
- Add a squeeze of lemon, then season with salt and freshly ground black pepper and stir.
Notes
- Chop the onion really finely and use a garlic press to mince the garlic. As you won't be blending the peas and just using a potato masher, this will mean you won't get huge chunks of garlic or onion in your mushy peas. Unless you love big chunks, then in which case, cut them larger!
- If you prefer a smoother texture, use a stick blender to blend the peas, until they resemble the texture of a thick puree. The peas are delicious served with scallops like this!
- Add the mint slowly & taste as you go, adjusting the amount of mint used to tailor it to your taste preference.
- Balance the Sweetness. Adding a pinch of sugar to the cooked peas can help balance any natural sweetness lost during freezing and cooking.
- Add a touch of creaminess. For a richer and more decadent flavour, stir in a splash of heavy cream or crème fraîche. ( Dairy-free if needed)


Comments
No Comments