


These tender & juicy slow cooker pork belly slices are finished off in a sweet & sticky sauce that creates a flavour explosion in your mouth! Delicious served with some fluffy rice for a tasty Chinese fakeaway.
If you only do one thing today, you need to make these slow cooker pork belly slices!
Want to Save This Recipe?
Enter your email & I'll send it to your inbox. Plus, get great new recipes from me every week!
By submitting this form, you consent to receive emails from The Scatty Mum.
Cooked in the slow cooker, the slices become soft and tender bites that just melt in your mouth, just like this slow cooker BBQ beef brisket!
To make them even tastier, we will then finish them off in a hot pan to render down the fat and make them crispy on the outside, whilst still maintaining that fall-apart soft centre.
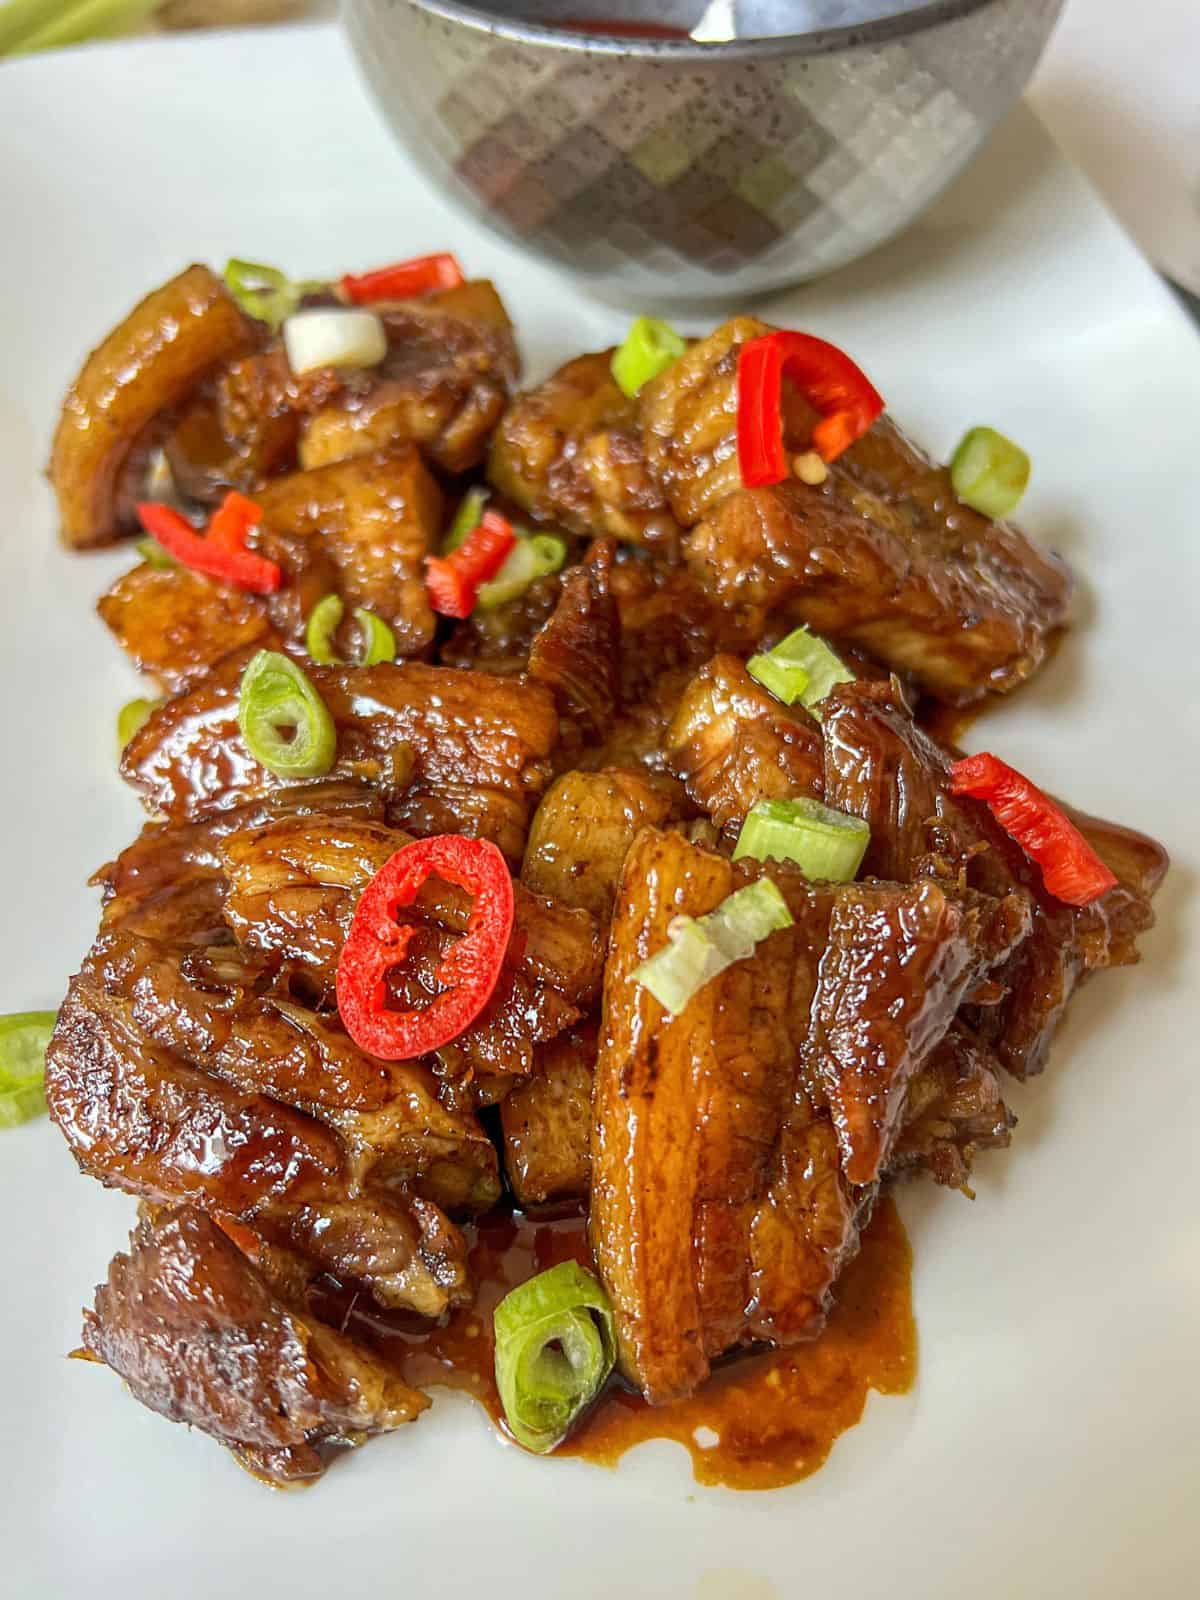
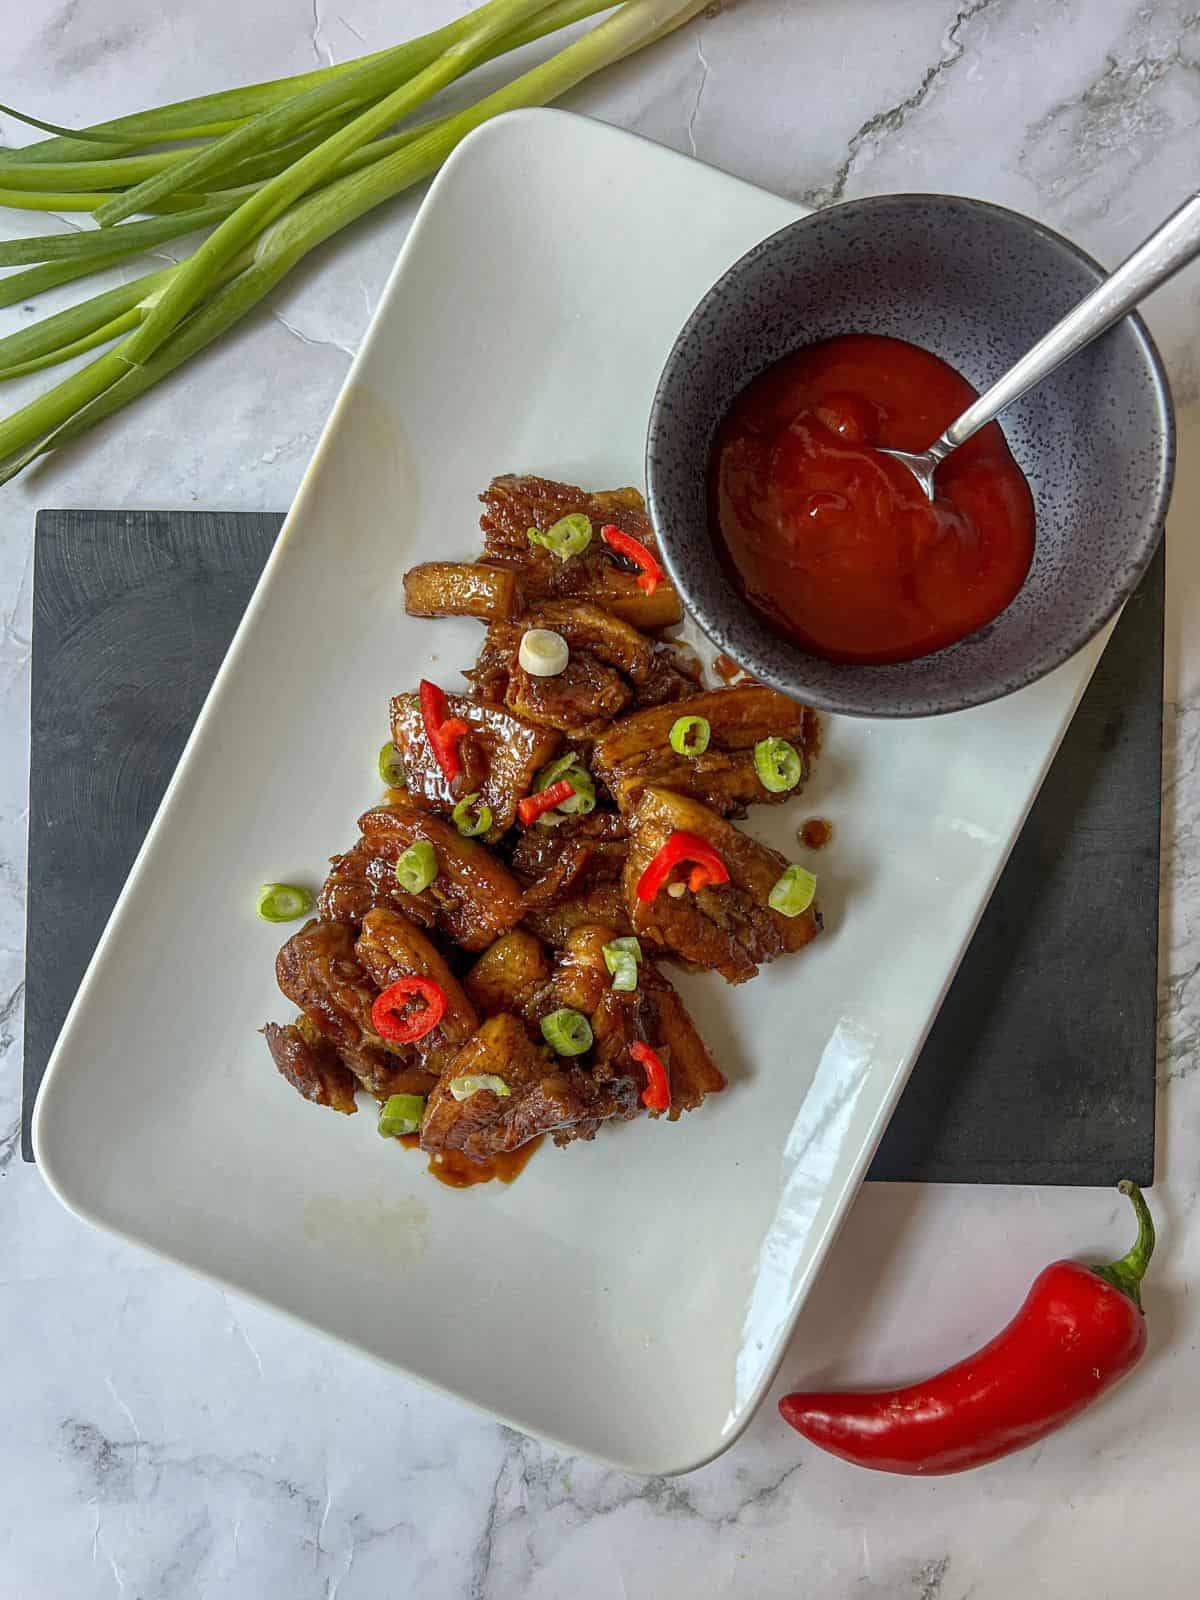
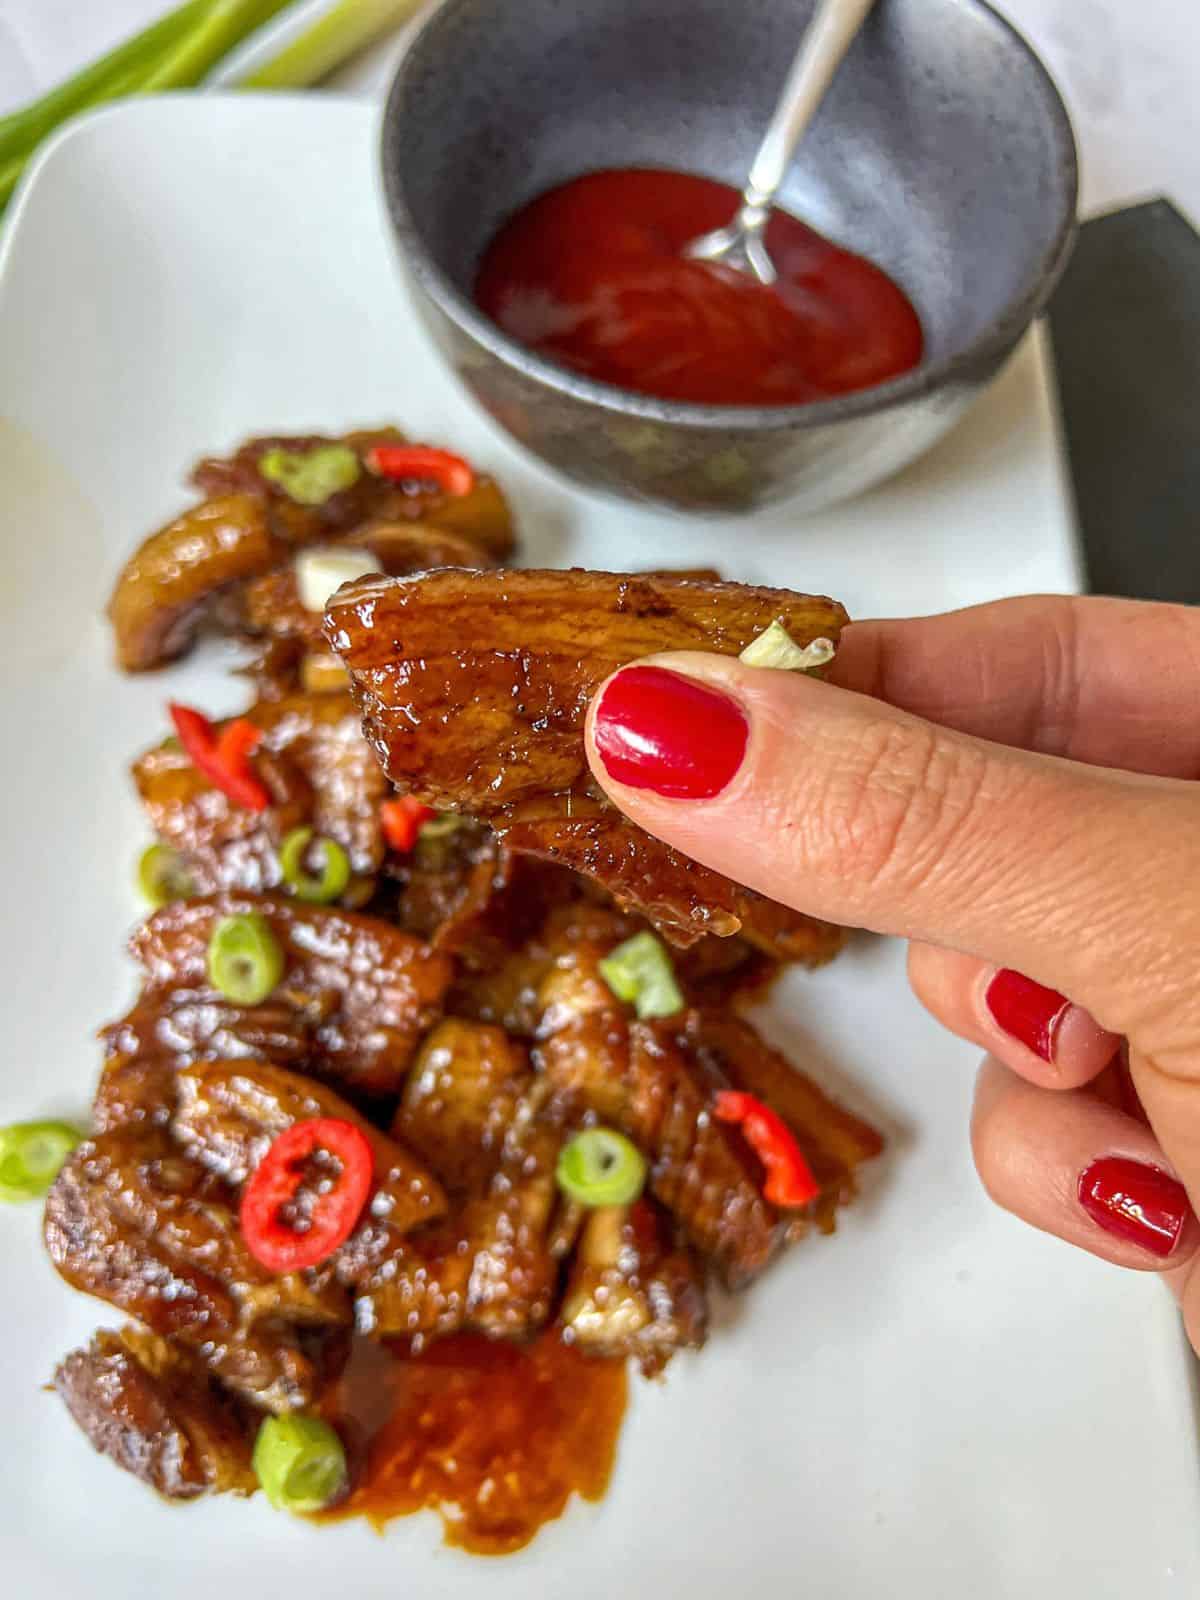
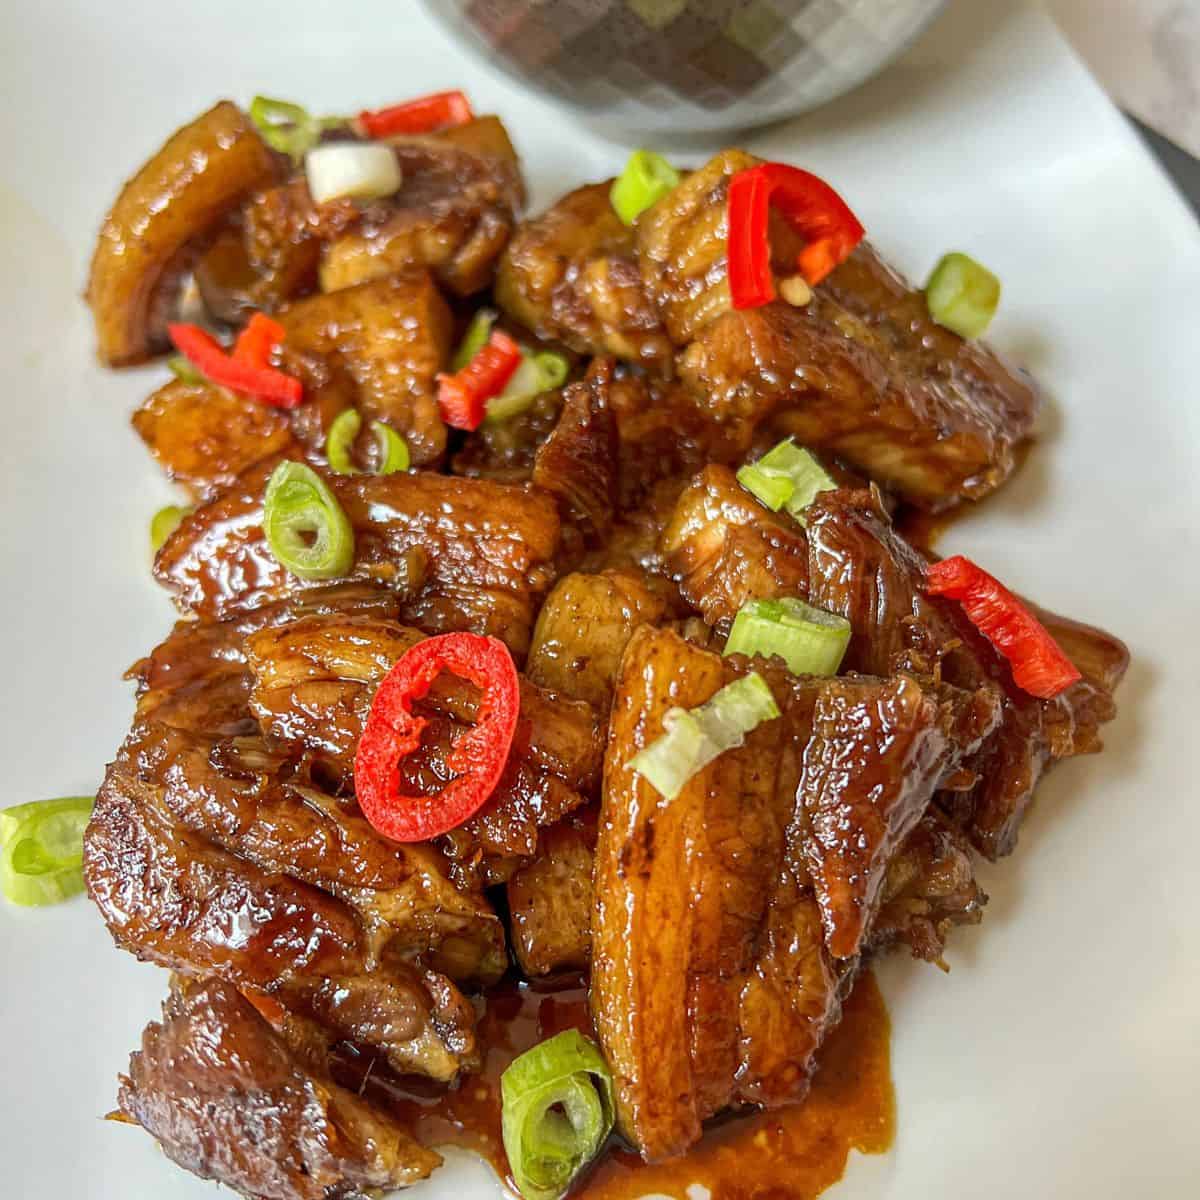
Then to finish, we will coat them in a sweet and sticky Chinese inspired glaze, before garnishing with sliced spring onion & fiery red chilli for a final punch of flavour.
Now, I get it-pork belly can be high in fat, so I'm not suggesting you indulge in dishes like this every day.
However, this cut of meat is undeniably delicious, and these melt in your mouth pork belly bites are so addictive and full of flavour that I strongly encourage you to give them a try!
If you are short on time but are set on pork belly for tea, check out these tasty air fryer pork belly strips instead!
Jump to:
🥘 Ingredients You Will Need
Here is a brief overview of the ingredients you will need to make these pork belly slices. To find out how to make them allergy-friendly, simply scroll down to the section below this one.
✋ Double check all packaging for allergens ✋
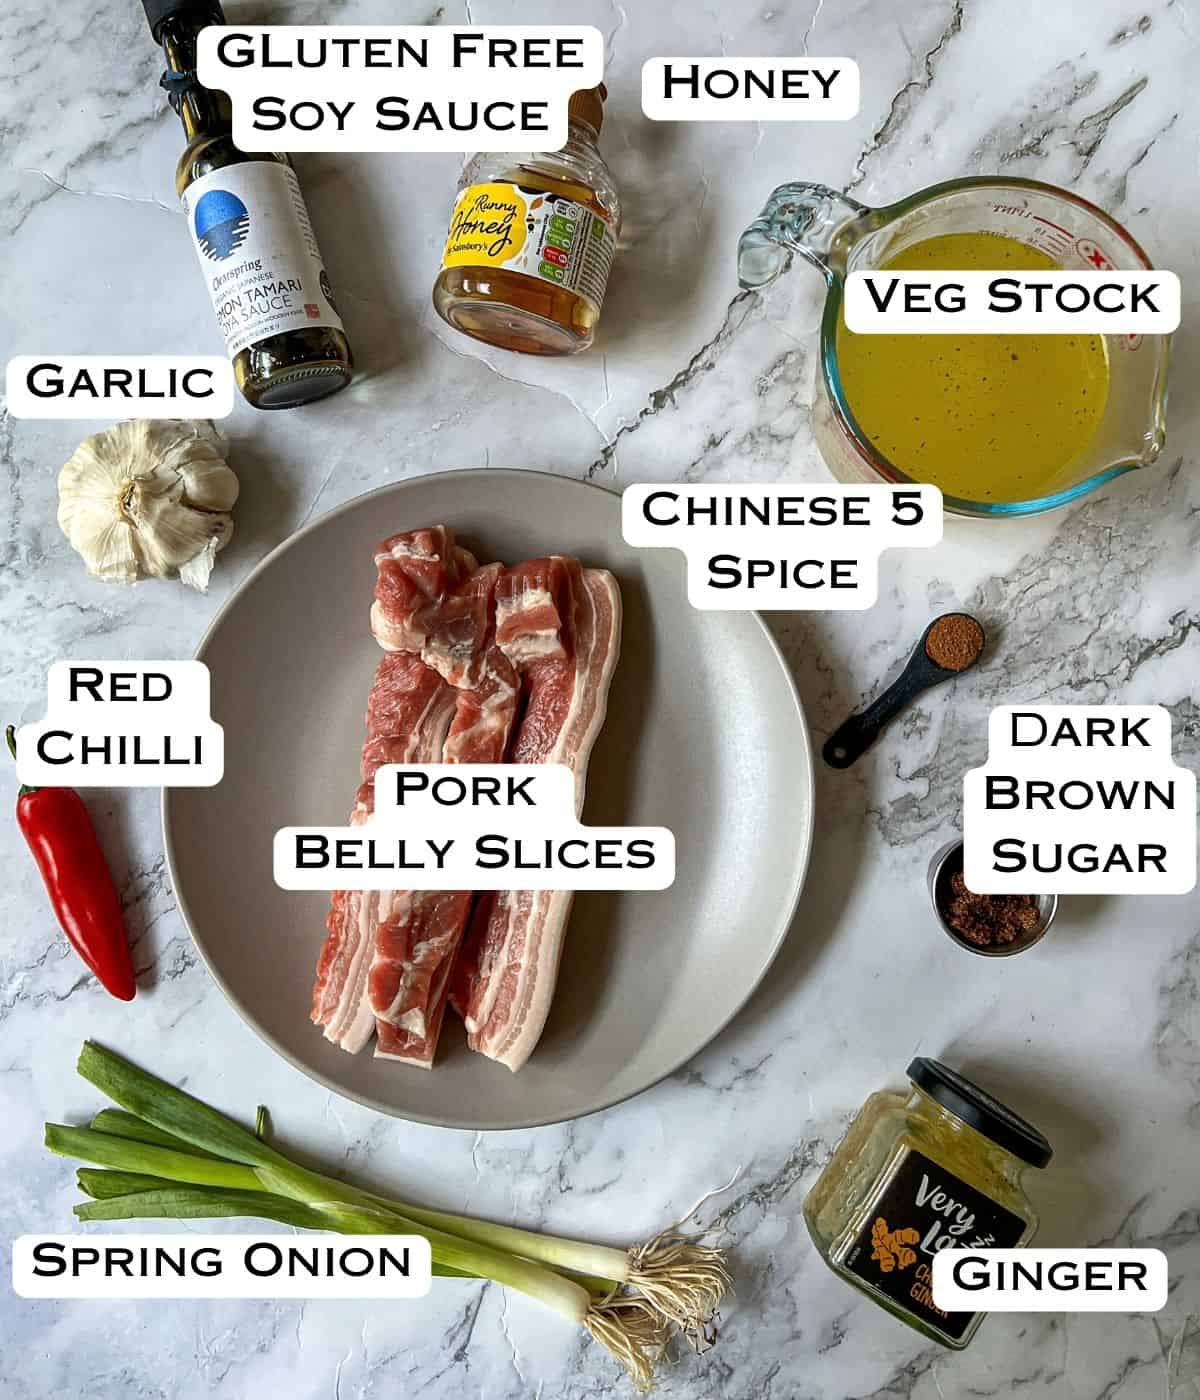
For The Pork Belly
- Pork Belly Strips - You can buy pork belly pre-sliced in most major supermarkets or if you are buying it from a butcher, ask them to slice it for you.
- Chicken Stock - The belly pork is slow-cooked in the chicken stock. I love using Knorr chicken stock pots as they are dairy-free and gluten-free. Always double check the packaging as most stocks contain gluten or dairy.
- Chinese 5 Spice - Added to give some Chinese style flavour to the pork.
- Garlic & Ginger - This is added to the cooking broth to add extra flavour to the pork. You can use fresh garlic & ginger, or for ease, the pre-chopped frozen versions are great too.
For The Glaze
- Honey - The honey gives the glaze that delicious sweet flavour, but also the sticky texture. Squeezy honey from a bottle is easiest to use.
- Dark Brown Sugar - Using dark brown sugar will give the richest, stickiest texture. I wouldn't advise using white sugar for this recipe.
- Soy Sauce - This gives the salty umami taste to the pork belly and is a staple in Chinese cooking.
- Red Chilli - Added for some heat, feel free to leave out the chillies if you prefer a milder taste.
To Garnish
- Red Chilli & Spring Onion - These are thinly sliced and scattered over the top of the pork belly for extra flavour and texture.
See the recipe card for full information on ingredients and quantities.
🤔 How Can I Make This Allergy Friendly?
This recipe is pretty allergy-friendly as it is, but with a couple of tweaks, it can be easily altered so everyone can enjoy it!
- ✔️ Make It Gluten Free: Check the ingredients of your stock cube to make sure its gluten-free and use a gluten-free soy sauce or tamari (which has a very similar taste) instead.
- ✔️ Make It Dairy Free: Again, you need to check the ingredients of the stock cube but other than that the recipe is dairy-free.
- ✔️ Make It Soya Free: Use coconut aminos instead of soy sauce, which is a great soy-free alternative that tastes much the same.
✏️ How To Make - Step-By-Step Instructions
⬇️ Here you will find an overview of how to make the recipe. For full information on ingredients and quantities please see the recipe card at the bottom of the page ⬇️

Step 1: Take the garlic and ginger and finely chop them into small squares.
Step 2: Place the pork belly slices in the bottom of the slow cooker & pour over the chicken stock, Chinese 5 spice, garlic and ginger.
Step 3: Cook on high for 4 hours or on low for 6.5 hours until the pork is melt in your mouth tender.
Use a meat thermometer to check the pork is cooked. It should be at least 145˚F / 63˚ C.
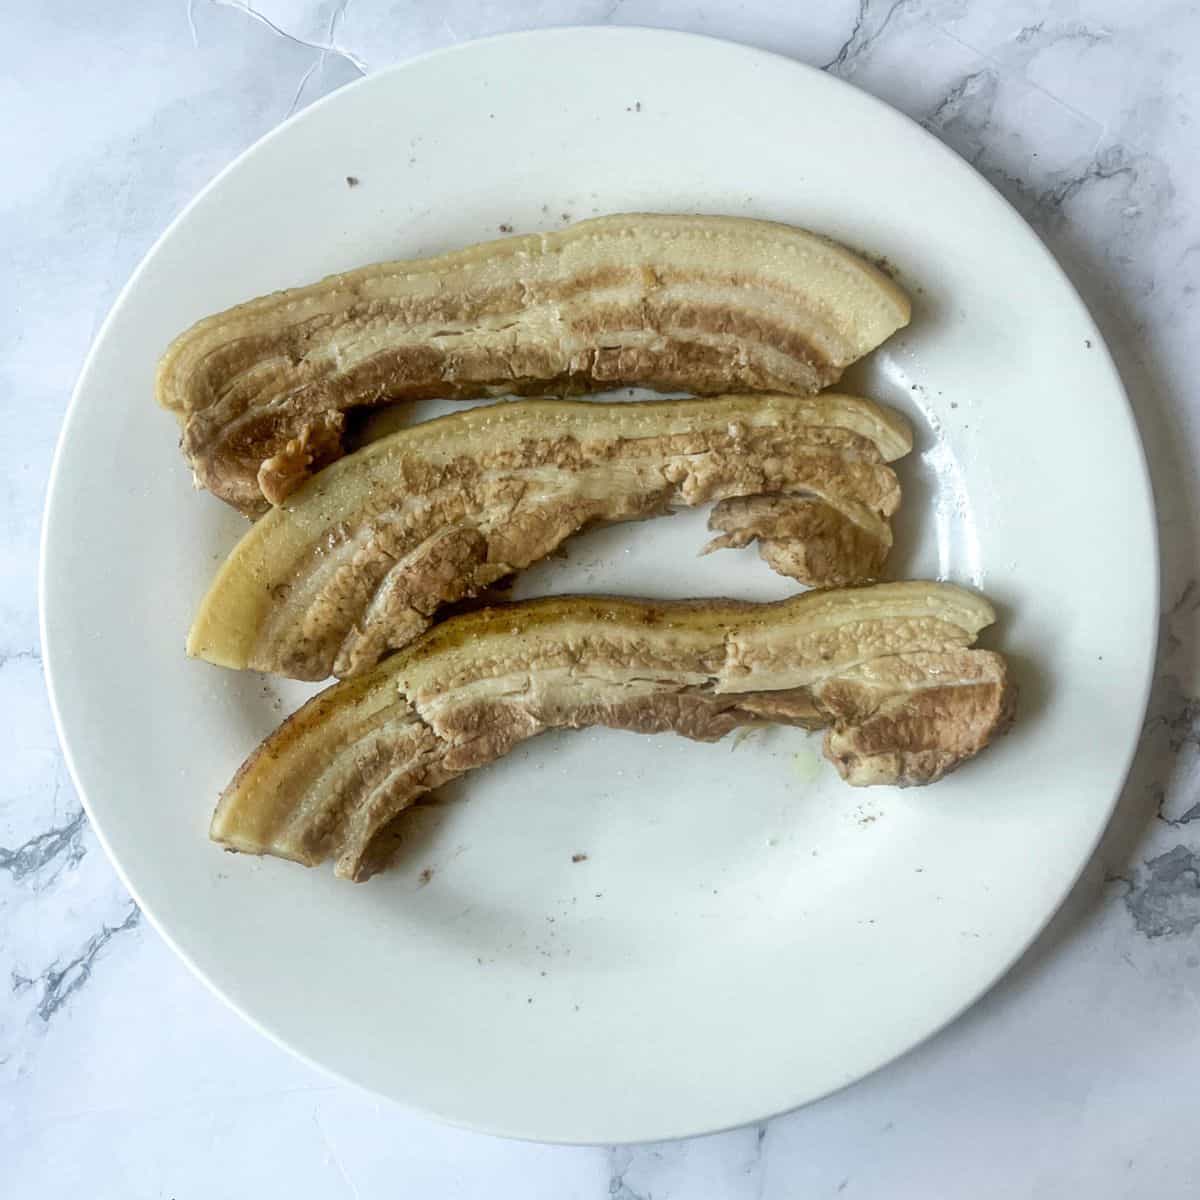
Step 4: Gently take out the pork belly slices from the slow cooker. Pat them dry using a kitchen paper towel, this helps to take any moisture away from them to help achieve a crispy finish.
You can either discard the stock or save it for another day. I personally find it a bit salty to re-use.
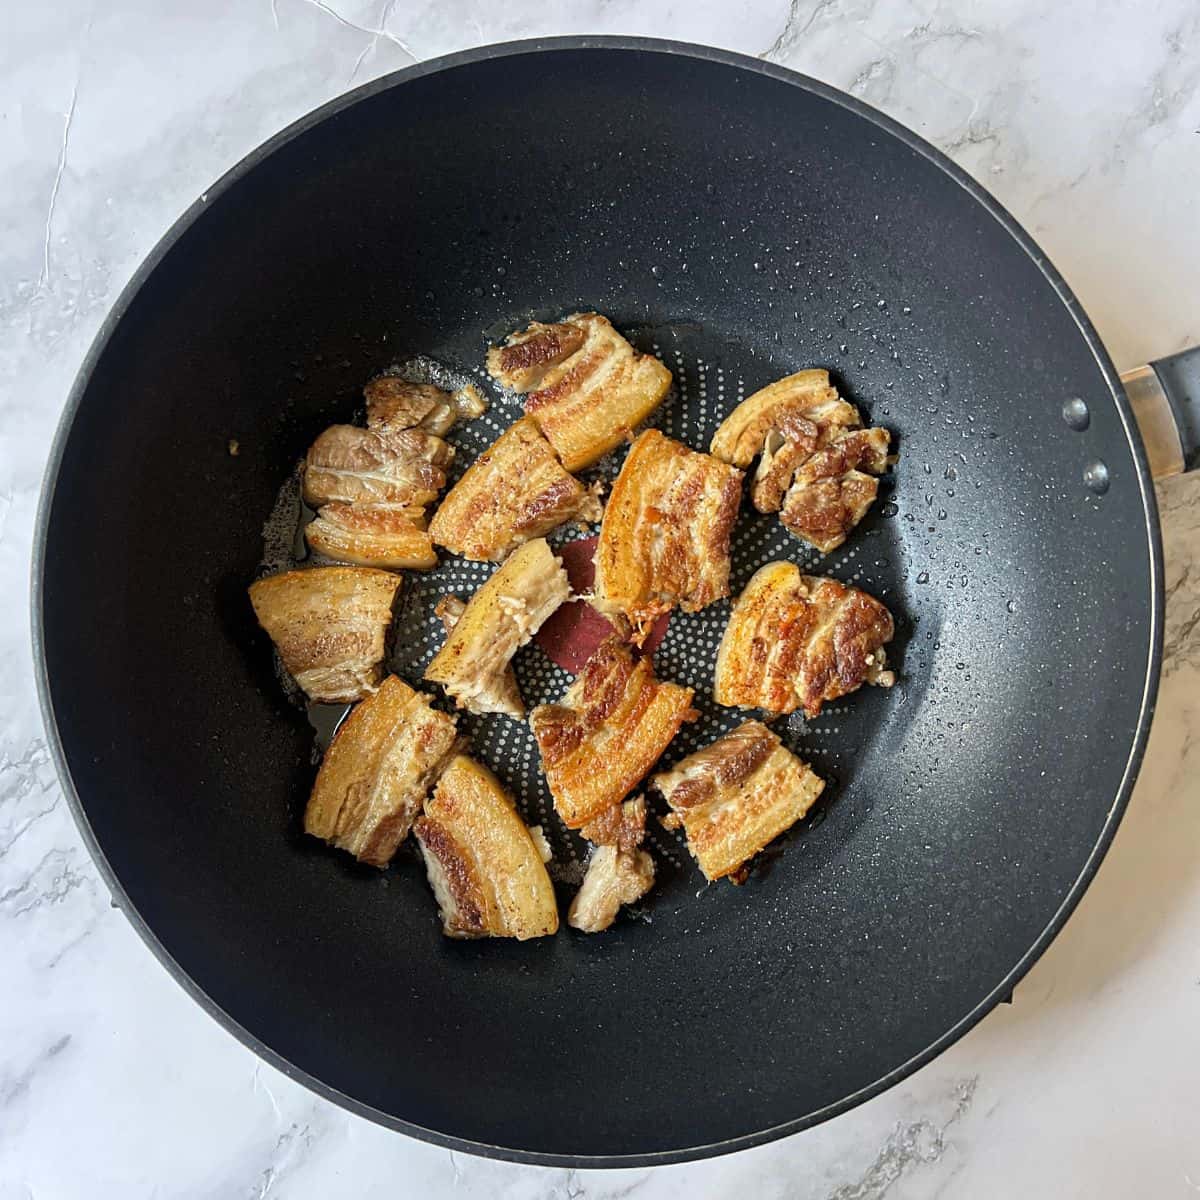
Step 5: Cut each pork belly strip into four bite-sized pieces, then add them to a hot wok or pan with some oil and fry for 2-3 minutes on each side until the fat begins to brown and crisp up.
(You may need to do this in two batches)
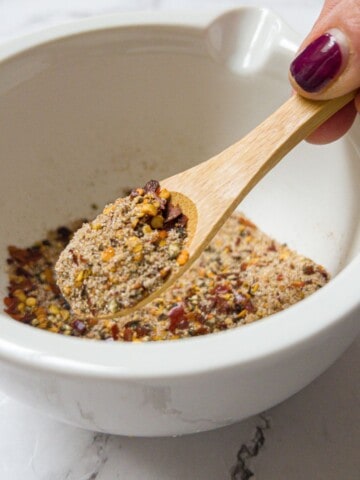
Step 6: While the pork is crisping up, mix together all the glaze ingredients in a small bowl.
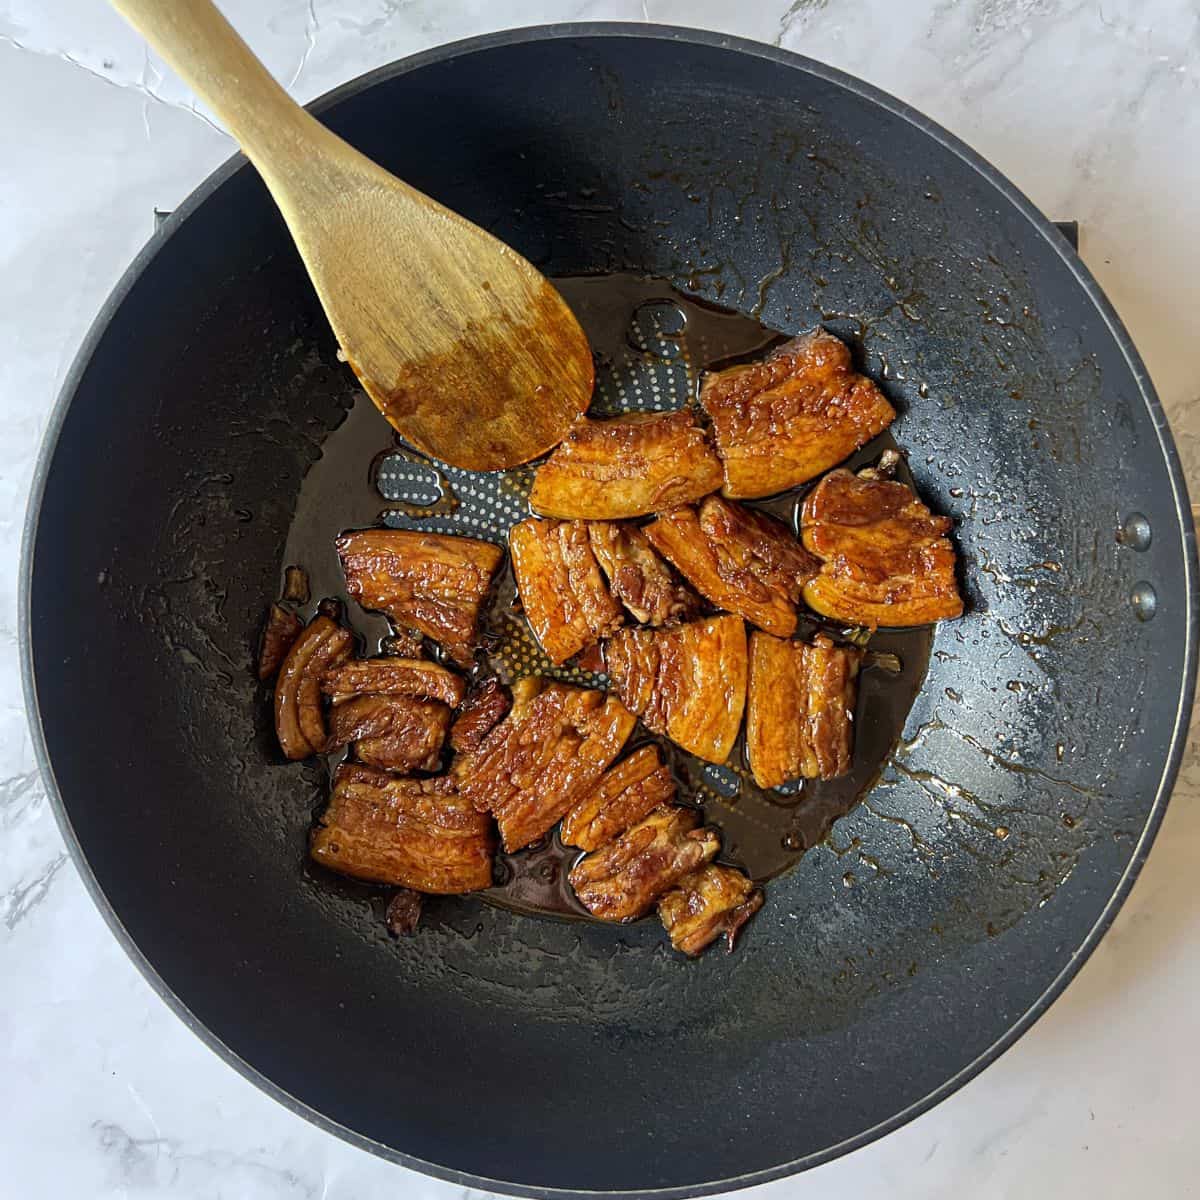
Step 7: Drain off any excess fat from the pan, then generously pour the glaze over the pork bites.
Continue cooking for an additional 1-2 minutes, allowing the sauce to caramelise and create a sticky, flavourful coating on the pork belly.
Step 8: Serve immediately, garnished with sliced spring onion and red chilli.
🤔 What If I Don't Have A Slow Cooker?
No problem! If you don't have a slow cooker or are pushed for time, place the pork, along with the stock, garlic, ginger and 5 spice in a large lidded casserole dish that will work on your hob & simmer for 2 hours on a low heat on the hob until tender.
💡 Tips & Tricks
- ✔️ Discard The Stock: Personally, I find the stock too salty to cook with again so I pour it away, but taste it before you throw it in case you like it!
- ✔️ Use a Meat Thermometer: Check the pork is cooked with a meat thermometer. It needs to reach an internal temperature of at least 145°F / 63°C. It should be way over that after 4 hours, but its best to check.
- ✔️ Pat Dry With A Paper Towel: Pat the pork belly dry after slow cooking as crispy skin needs a dry canvas!
- ✔️ Don't Skip The Pan Frying: This is what helps the fat to brown and turn deliciously crispy.
- ✔️ Use A Splatter Guard: The pork can spit quite a bit whilst frying in the pan, so its a good idea to use a splatter guard to stop the grease flying around your kitchen!
- ✔️ Get Experimental With Your Toppings: Sprinkle over some sesame seeds for extra crunch.
🥡 Storage, Reheating & Freezing
These slow cooked pork belly slices are best eaten straight away as this is when they will be at their most tender & the sauce is at its stickiest, however, it is perfectly safe to store them for another day.
Storage
Once cool, place the belly slices in an airtight container and store in the fridge for up to 3 days.
Freezing
First of all, freeze the bites flat on a baking tray for 1 hour until hard, ( this stops them all sticking together) before transferring to a freezer safe container where they can live for up to 3 months.
Defrost in the fridge overnight.
Reheating
Reheat the pork in the microwave for a couple of minutes until piping hot throughout.
🍴 How To Serve
Create your own Chinese fakeaway feast and serve up the slices alongside some egg free fried rice or noodles with broccoli.
They also taste delicious alongside a fresh cucumber salad or simply as an afternoon snack or part of a party buffet.
Chop up the slices and use in this pork belly fried rice.
💬 Recipe FAQs
Does pork belly get softer the longer you cook it?
Yes, pork belly slices become increasingly tender the longer they are slow-cooked, as the low and slow-method breaks down collagen and fat, which results in a melt-in-your-mouth texture. There is a limit though, so don't leave it too long!
How can I make the dish less spicy?
To reduce the spice level, leave out the red chilli in the glaze and serve extra sliced chilli on the side for those who enjoy extra heat.
Is it necessary to pan-fry the pork belly slices after slow cooking?
I would recommend pan-frying if you want to achieve a crispy exterior. If you prefer a softer texture, you can skip this step, but you won't get that lovely crunch.
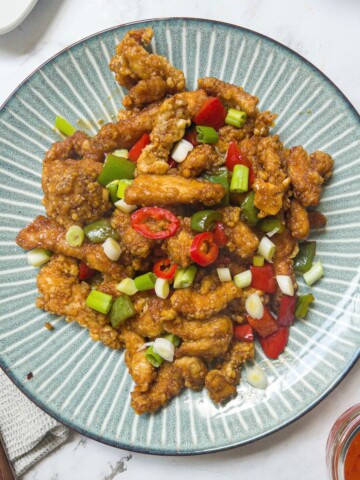
📖 More Chinese Inspired Recipes
Why not try these other tasty Chinese-style dishes too!


If you loved this recipe, please leave me a 5🌟 rating or comment below. I really do appreciate it. 😊
📖 Recipe
Slow Cooker Pork Belly Slices
Equipment
- Splatter guard optional
- Meat thermometer optional
Ingredients
For The Pork
- 1 kg ( 2.2lbs ) pork belly slices
- 2 cloves garlic finely chopped
- 5 g ( 1tsp ) fresh ginger finely chopped
- 1 teaspoon Chinese 5 spice
- 1 litre ( 4 cups ) chicken stock check packaging for allergens
For The Glaze
- 2 tablespoon dark brown sugar
- 2 tablespoon honey
- 4 tablespoon gluten-free soy sauce or tamari
- 1 medium red chilli finely chopped
To fry
- 1 teaspoon vegetable oil
To Garnish
- 1 medium spring onion finely sliced
- 1 medium chilli finely sliced
Instructions
- Finely chop the garlic and ginger.
- Place the pork belly slices in the bottom of the slow cooker.
- Pour over the chicken stock, Chinese 5 spice, garlic & ginger.
- Cook on high for 4 hours or low for 6.5 hours until the pork is tender. (Check the pork is cooked with a meat thermometer - it should be at least 145˚F / 63˚C)
- Remove the pork from the slow cooker and pat dry with a kitchen paper towel. Discard the stock or save for another day.
- Heat the oil in a large frying pan.
- Slice each strip into four pieces and add the bites to the hot pan.
- Fry for 2-3 minutes on each side until the fat starts to brown and turn crispy. The pork can spit a bit, so you may want to use a splatter guard.
- Meanwhile, mix all the glaze ingredients in a small bowl.
- Drain any excess fat from the pan, then pour over the glaze and continue to cook for a further 1-2 minutes until the sauce starts to caramelise and stick to the pork belly.
- Serve immediately, garnished with sliced spring onion and red chilli.
Notes
- Discard The Stock: Personally, I find the stock too salty to cook with again so I pour it away, but taste it before you throw it in case you like it!
- Use a Meat Thermometer: Check the pork is cooked with a meat thermometer. It needs to reach an internal temperature of at least 145°F / 63°C. It should be way over that after 4 hours, but its best to check.
- Pat Dry With A Paper Towel: Pat the pork belly dry after slow cooking as crispy skin needs a dry canvas!
- Don't Skip The Pan Frying: This is what helps the fat to brown and turn deliciously crispy.
- Use A Splatter Guard: The pork can spit quite a bit whilst frying in the pan, so its a good idea to use a splatter guard to stop the grease flying around your kitchen!
- Get Experimental With Your Toppings: Sprinkle over some sesame seeds for extra crunch.
- Make It Gluten Free: Check the ingredients of your stock cube to make sure its gluten-free and use a gluten-free soy sauce or tamari (which has a very similar taste) instead.
- Make It Dairy Free: Again, you need to check the ingredients of the stock cube but other than that the recipe is dairy-free.
- Make It Soya Free: Use coconut aminos instead of soy sauce, which is a great soy-free alternative that tastes much the same


Gerardine Lynch says
very good, little preparation required and all ingredients already in the kitchen
Lauren Woodger says
Glad you enjoyed the recipe Gerardine 🙂
Margaret Stanley says
Made this tonight. It was a huge success. Will definitely do it again. Thanks
Lauren Woodger says
So happy you loved the recipe! Its a great way to cook pork belly isn't it 🙂