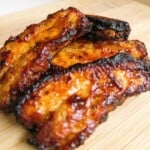
Crispy Air Fryer Pork Belly Slices
Pork belly slices cooked in the air fryer until tender and crisp, then coated in a sticky BBQ glaze. Ready in around 30 minutes with no pre-boiling.
Servings: 2 servings
Calories: 829kcal
Equipment
- Meat thermometer optional
- Air fryer liner optional
Ingredients
- 300 g (10.5 oz) pork belly slices
- 2 tablespoon BBQ sauce check packaging for allergens
- ½ teaspoon garlic powder
- ½ teaspoon black pepper
- ¼ teaspoon salt
- 1 teaspoon olive oil
Instructions
- Preheat your air fryer to 400°F / 200˚C.
- In a large mixing bowl, mix together the olive oil, garlic powder, salt, and pepper.
- Pat the pork belly slices dry with paper towels.
- Add the pork belly slices to the mixing bowl and using your hands or a spoon, toss the pork until evenly coated in the seasoning mixture.
- Spray the basket with olive oil, then place the pork belly slices in a single layer in the air fryer basket, making sure they do not overlap.
- Cook for 15 minutes, flipping the slices every 5 minutes.
- Baste the pork belly with the BBQ sauce and cook for a further 5 minutes.
- Turn over the pork slices, baste the other side with the BBQ sauce and cook for a final 5 minutes.
- Remove the pork belly slices from the air fryer and let them rest for a few minutes before serving.
Notes
- I tested this recipe in my Ninja Foodi Dual Zone Air Fryer using standard supermarket pork belly slices. If your slices are thicker than mine, they'll need a little longer to cook.
- Cooking times are a guide. Every air fryer cooks slightly differently, so always check the pork is cooked through and beautifully tender before serving.
- For thicker pork belly slices, add an extra 5–10 minutes to the cooking time, checking regularly until the fat has rendered and the pork is tender.
- Pork belly releases quite a lot of fat as it cooks. If your air fryer starts to smoke, carefully pause the cooking and check whether excess fat has collected underneath the basket. Always follow your air fryer's manufacturer's instructions when cooking fatty cuts of meat.
- To reheat, pop the cooked pork belly back into the air fryer at 180°C for 3–5 minutes, or until piping hot. This helps crisp the edges back up much better than using a microwave.
- To make this recipe gluten-free, simply use a gluten-free BBQ sauce and double-check that any seasonings you use are certified gluten-free.
Nutrition
Calories: 829kcal | Carbohydrates: 8g | Protein: 14g | Fat: 82g | Saturated Fat: 29g | Polyunsaturated Fat: 9g | Monounsaturated Fat: 39g | Cholesterol: 108mg | Sodium: 526mg | Potassium: 335mg | Fiber: 0.4g | Sugar: 6g | Vitamin A: 58IU | Vitamin C: 1mg | Calcium: 16mg | Iron: 1mg
